Sunday, April 7, 2013

My new Storenvy shop, Lu & Ed's 3-year Anniversary and giveaway!


  • Love handmade?  Check
  • Support small business? Check
  • Crazy about unique and custom made? Check and Check

That's me!  I would also add to my list - passionate (or obsessed - depends on who you ask) about crafting.

And there are so many others like me.  Just recently, I joined a great group of crafters that have an online shop on http://storenvy.com.  While I had an online shop already, I felt I was a tiny grain of sand and no matter how different I tried to look, I was getting lost in the full beach of sand, rocks and bigger rocks.  So, I decided to open a Storenvy store, Twisted Thread and Hook and I'm starting big with the help of Lu & Ed.  I still have my Etsy store and will keep both stores open as each of them have some good things about them.

Lu & Ed is celebrating a 3-year anniversary of her successful Storenvy shop.  I could not be more happy for her and I hope that I would be able to do the same in 3 years as well.

And what is the best way to celebrate this big accomplishments?  Share it with the fans and everybody who can put a check on any or all of the bullet points at the beginning of this post.

What does that means?  A HUGE giveaway!
The contest is open from 12AM EST 4/7 to 12AM CST 4/13 2013.

Go to Lu & Ed's blog to check out the details:


BUTTON

There are 18 prizes donated by different small business owners.  They are worth over $250 :)

One of the prizes, is my purple dream catcher:


Whether you just love to shop, or you are a passionate crafter ready to sell your creations, sing up on Storenvy.com to be part of this great community.  Then check out these great shops that graciously offered their creations for this giveaway in celebration of Lu & Ed's great success.


"Mon-stors are eco-friendly toy storage solutions for kids! You can hang them from a door, in the closet, or even in a car - and have your kids feed their Mon-stors toys, laundry, jackets and gloves or anything you need extra storage for!"


Custom Mollie dolls - "Mollipops, Mollie Moe Bows, and Mollie Dollies!"


"Little Green Guy features handmade plush toys, sculptures and adorable monster themed art!"


"Melli's Yarn Works features my loom knitted items! From hats, to scarves and wrist warmers as well."

"We make little something specials for your special Littles! Did you know-Monster Banks love nomming on coins and helping Littles learn counting! They're also proficient at scaring away boogeymen."

Need help creating the individual look for your shop?
"The Individuality is based on just that, Individuality. We believe that you should control the look and feel your design need presents. The best way to do this, custom designs by The Individuality geared towards your choices."

"Sew Beastly's products are handmade, ruffled accessories with sustainability in mind. Products feature my signature textured ruffle. Scraps are given a new life by repurposing them into the "Scrap Me Pretty Collection"."

"I design handmade and custom jewelry with lots of sparkle and personality. I am influenced by a variety of styles from Boho to Victorian, and often look to vintage jewelry & clothing as an inspiration."

"Impistry is the action of making goods & art using Imps as the focus. Each item that passes through the digital doors of this shop is unique, handmade, and given a 'spirit' during the creative process."

"When you're not just looking for A wand, but Your Wand. GipsonWands makes Harry Potter inspired "Magic" wands. All Wands are handmade from naturally dried locally sourced trees or salvaged lumber with a hand rubbed oil finish."

"We make Good Monster Goods: Books, prints, art, comics. For you. Since 2005."

"Handmade accessories for you & your little flower! Violet's Buds strives to be green by upcycling, repurposing, and making the most out of all our supplies while creating a unique item for you."

"Krmbal is an indie brand dedicated to eco-conscious choices & partnering with small businesses. Take back your t-shirt! We donate a portion of all sales to Kiva borrowers to help others build their small businesses."

"We strive to provide low-impact, minimal ingredient beauty, bath, and body products to dudes and dudettes around the world."

air fresheners - "We offer products that are quality products that only we would purchase ourselves.  If we wouldn't buy it, you won't find it in our store.  That's a promise"

"Frankensticth making one of a kind handmade storied monstas since 2003"

Handmade crochet jewelry and wall & window art. I mainly use fine thread to achieve unique, delicate results. I also make crochet rugs and mats using thick rope-great for nautical theme decor.


Thursday, April 4, 2013

Mother's Day Gift Ideas - Vintage and Handmade from small businesses


Wednesday, March 27, 2013

What Else Can You Do With Easter Egg Dye?

 Our tradition is, as in many families, to dye eggs for Easter and decorate them. This year was no different. My 3-year-old and 5-year-old were very excited. At the end, it ended up being a 2 day project.

What you would need:
  • cups with prepared dye left over from dying Easter eggs
  • popsickle stick or a straw
  • plastic shopping bag
  • glue stick
  • card stock

Day 1 – Dying
We had a monster egg decorating kit. We put each of the 6 eggs in the containers with different water color. After they were done and dry, kids decorated them with orange hair, pipe cleaners and stickers, By the time I took this picture, two of them either fell on the floor or got smashed on the table so only 4 are shown:


I thought it was wasteful to just dump the dye only after dying 1 egg in each color. I started thinking what else we could dye. Hmm.. how about paper towels and cotton balls? So that's what we did.
Paper Towel - I ripped paper towel into narrow, long pieces. Kids dipped one end in whatever color they wanted while holding to the other end. Some strips, we dipped one end in one color and the other end in a different color so we could see how the colors mix in the middle. I think I forgot to mention, this can get a little messy...
After each strip was done (no need to squeeze access water), we lined them on a plastic shopping bag and left them overnight to dry.


For couple of strips, instead of dipping, we took a popsickle stick (you could use a straw, too) and dipped that instead in the dye. Then we dripped the dye on the towel which gave it a more colorful look:


Cotton Balls – These were a little bit more messy. We did similar thing as with paper towels where we dip them in the dyes. However, it was necessary to squeeze out some of the water unless you plan to wait forever (in kids terms) for them to dry. It also helps if you stretch them out some so they can dry better. Couple of our cotton balls that I did not stretch too well were still wet the next day.


DAY 2 – Collage
The next day, when paper towel and cotton balls were dry, we ripped the paper towel into small pieces.


Each child got a piece of paper (card stock works better since it's thicker) and a glue stick and they they started gluing. It's better if glue goes on paper (not the paper towel or cotton balls) or it can get very messy (paint dissolves and cotton sticks to the glue). I told them to create whatever picture they want. 


My son created a beach, ocean and sky with the sun – he's excited about our upcoming vacation in Bermuda! Originally, the sun was the Bermuda island, but since it ended up between clouds, he decided it's a sun instead ;).


My daughter just had fun using the glue and making nothing in particular (on both sides of paper :)).


And that's my creation using leftovers kids didn't use :)


One other thing that's so great about this project for mom or dad... It takes a while to glue small pieces of paper towel and cotton balls, so it could give you some extra time to get those dishes done :)

If you decide to do this project, I would LOVE to see the pictures of the finished projects.  You can share them on my Facebook page.  Let me know how it worked for you and your kids.  

Monday, February 4, 2013

Crochet Rope Rug - My ToDo list #2


I'm happy to say the year started well at least when it comes to my Crochet ToDo list.  I already accomplished task #2 on the list which is the biggest (though not the most difficult) one - crochet rope rug. It found a great spot in my sun room. We just had a party for my daughter's 3rd birthday and the rug passed the test :) One of the guests at the party made a suggestion that it would also look great as a wall decoration. The weight would have to be taken under consideration, but I can definitely see it on a wall as well.


My eyes needed a break from the fine thread and tiny hook I've been using lately to make jewelry. I thought it was a perfect time to try making a rug using the largest hook I could find and a heavy rope. To give you an idea of the difference, here is a crochet chain made using the rope and the fine crochet thread.


My  inspiration came from the mega doily rug by Ladies and Gentlemen.

I ordered 100% cotton rope (and found out it’s much more expensive than yarn!) and was very excited when the large spool was delivered to my house.


As soon as I opened the large and heavy box, I started working on my new project.  I found a simple doily pattern in the shape of flower from BURDA Special magazine - Geschenke häkeln E 167. With slight modification, this pattern was a great fit for a rug.


I was making good progress, when my project came to a halt. My huge crochet hook broke.  I had to take a couple of days break while waiting for my new crochet hook to arrive.  


When my new, red crochet hook came , I was off to work again.  My son was very eager to see the rug completed. He already had his ideas of where we could put it.  At 5 years old, he’s my biggest supporter of my crochet obsession :o).  


And almost 900 feet and 13 pounds later, the 4 foot rug was completed.  At the end, my eyes did get a break, but I cannot say the same for my hands and wrists. Still, I want to make another one and already have a different pattern in mind :)

I did decide to treat it with Vectra 22 rug protector (contains NO silicon or fluorocarbons) which hopefully will help with clean up of any mess my kids may make. I did some research on rug protectors and decided to go with Vectra. It seems it's a little better on being environmentally conscious and should be better to use around small kids in comparison to other more well known products on the market.

If you are looking to buy an already made crochet rope rug, you can find it for sale at my Etsy store.

Finished product modeled by my two munchkins.


http://twistedthreadandhook.blogspot.com/

Sunday, January 13, 2013

Snowflakes for Sandy Hook Elementary School Students


My goal is to make 2 things each year that would bring a smile to somebody or help a good cause.  When I heard about making snowflakes for Sandy Hook Elementary Children, I decided to crochet a couple.  While I know Connecticut PTSA was overwhelmed with people's donation of snowflakes from around the world, this was also my way of saying "I'm thinking of all of you that left this world way too early, you are all in my heart as well as all those that were affected by the Sandy Hook tragedy."  

I wish all the best for all the students and teachers of Sandy Hook Elementary and I hope you can find peace.


Where I got these patterns?


Tuesday, January 8, 2013

9 Beautiful, unique crochet projects that will make you want to learn how to crochet or spice up your ToDo list


Because my crochet ToDo list is not long enough (yeah, right!), I had to find new things to keep my crochet hook busy and inspired (it gets bored making the same thing over and over again).  I always like to try new things and keep myself challenged.  

This list consists of crochet projects that are something different than usual hat, scarf, granny square or pot holder.  If you have never crochet before, I hope this will give you an inspiration to learn this great craft (it’s not as hard as it looks!)
If you’ve been crocheting for a while as I have been, I hope you find something new and unique and add it to your ToDo list.


I hope to post a new blog entry for each of the accomplished item on my ToDo list.  This may take a while :)
Leave feedback and let me know what you like best from this list and if you’re planning to make it or wish somebody made it for you :).

1. Basket
I’ve seen baskets or bowls crocheted with soft yarn and then shaped and stiffened to keep that shape.  However, this one is different.  It uses a rope and you crochet around it.  Great idea for many different projects too.
Crochet Hemp Basket by CraftPassion.com


2. Rope Rug
As soon as I saw it, I found a nylon rope I had laying around in my house, the biggest crochet hook I had and never used before and found a doily pattern I thought would work great..  Only to be stopped quite early on because I ran out of rope.  Since I bought that rope years ago, I have no clue where I can find more of it.  In any case, it’s not the best rope for a rug anyhow.  Instead, I just ordered 100% cotton rope and cannot wait for it to come in the mail so I can try a rope rug.  It will look great in my sunroom!
Mega Doily Rug by Ladies & Gentlemen


3. Butterfly Wall Hanging
So this one is already crossed off my ToDo list and the picture of the finish product is shown below.  
I love it so much that I had to include it here.  It also makes me feel better to have something done on my ToDo list!  I made it for my daughter’s room and it goes great with the flower-butterfly curtains I made as well (see my earlier blog post).  If you search the internet for crochet butterfly, most hits you get are patterns of small butterflies or doily-like look which I’m not fond of.  This one is quite unique.  Check out other patterns on mypicot.com - great website.


4. Very cute Amigurumi
If you’re not familiar with amigurumi, it is a Japanese art of crocheting stuffed toys.  I’ve done some in the past and it’s always a fun project.  My kids love watching them emerge from the ball of yarn, though it’s never fast enough for them. There are lots of amigurumi patterns out there, but a lot are either very simplistic or the results are just not cute enough.  However, amigurumipatterns.net is one of the websites that has a great selection of very detailed oriented patterns.  Some you have to pay for, but once I get to this ToDo item, I will be willing to pay for a pattern like this.  Here are some examples.  I think the princesses definitely shine above the others (I might be slightly biased since my daughter loves princesses).


Sweet Pup
Graduation Owl
Armchair with 2 cushions and rug

Princesses


5. The smallest crocheted amigurumi ever

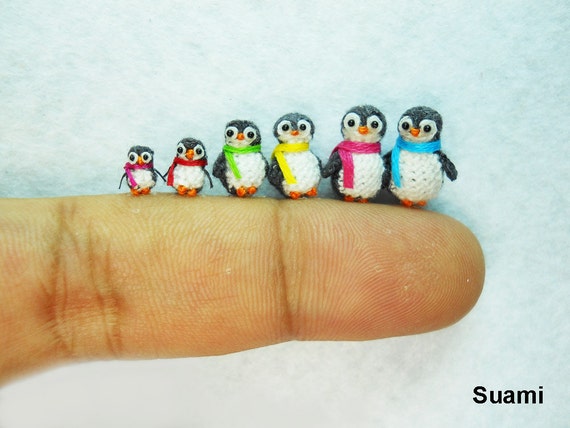
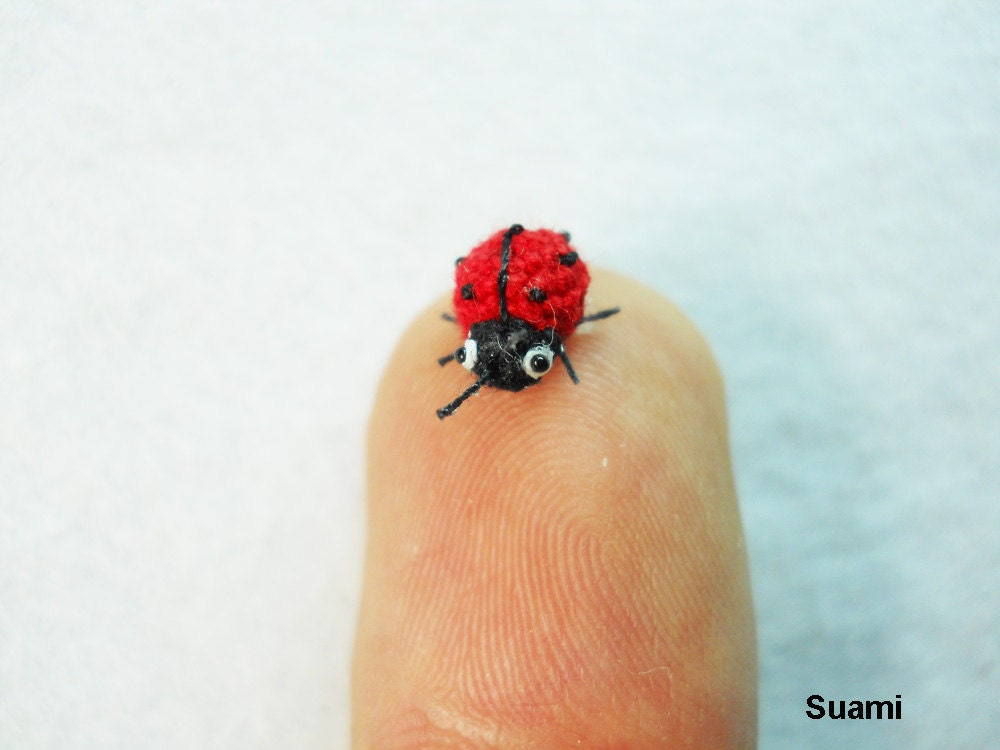
So the previous bullet gave you an idea what amigurumi is.  While detailed and may require some time to accomplish it, it is doable.  This one on the other hand will be one of the most challenging project yet for me.  I’m not even sure how to accomplish it because the smallest hook I have is .75 mm (and trust me, it’s very small) and it’s way too big to accomplish these creatures.  So tiny, and Su Ami still manages to make them very cute and very detailed.  Love it!


6. Clock - and it works!
This clock would be perfect for a little girl’s room.  I think my daughter’s room has enough crochet decoration, so I will have to think of a clock design that would fit a different room...  My head is already spinning with ideas...  This one is beautifully done by Natasja from UK.


7. Bag or purse from Italy
I’ve seen many crocheted bag patterns but none of them grab my attention as much as these ones done by La Catenella from Italy.  I wish they sold the patterns, but I guess I’ll have to try to figure it out on my own.  First thing is to find out what type of yarn or maybe fabric/trim is being used here...


8. Wire bowl
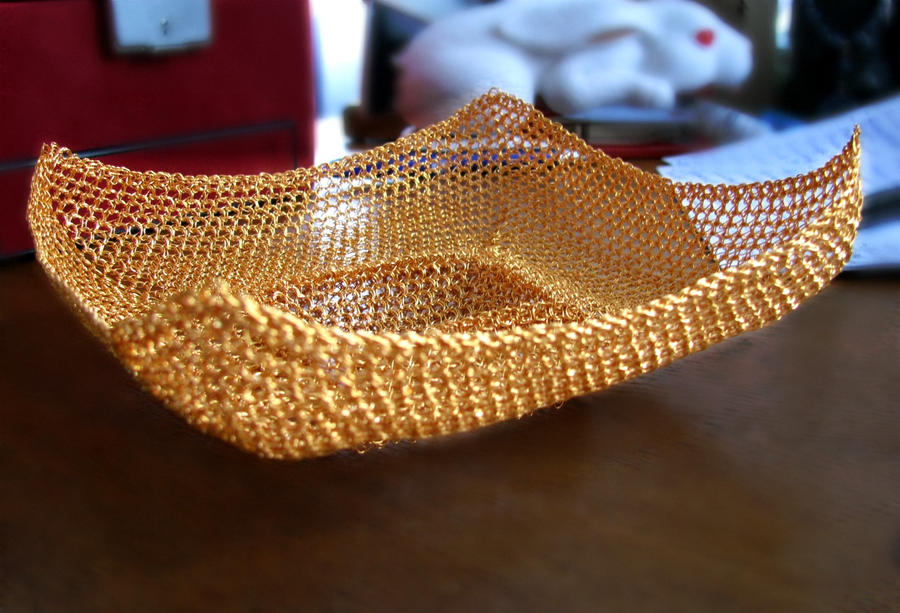
I’ve been thinking of making a centerpiece for my new sunroom.  One idea that came to my mind is a crocheted bowl but using wire instead of thread or yarn.  I actually never used wire for crocheting yet, so I’m looking forward to making that one.  I like the simplicity of this bowl made by CatsWire, but I may put my own twist on it...  I’ll know once I try using the wire and see how it works.


9. Wire necklace
I love making jewelry using thread (that’s what I sell in my Etsy store) and I love to try new techniques.  So my next venture that would hopefully end up in my Etsy store is crochet wire jewelry.  Here’s the piece  by CatsWire which I really like and it gives me some ideas for what I would like to do.  


Bonus. Playground
So to make it clear, this is NOT on my ToDo list.   I’m just so impressed with the idea and the sheer size of this project, that I had to include it as a bonus.  I can’t even imagine how long it took to make a whole playground!  It was designed by Japanese artist Toshiko Horiuchi-MacAdam.  My hat off to her.  I wish I could go there to play on it :)


Sunday, November 25, 2012

Crochet your own baby room window treatment or curtains


When I was pregnant with my daughter, I was getting a room ready for her.  The walls were painted blue not that long ago, so I really did not want to go through the hassle of re-painting them.  I figured I’ll just add things to make it girly.  I bought blue-purple butterfly wall decals and I fell in love with them right away.  However, I could not find right curtains for the windows.  I decided to sew them myself.  I’m not an expert in sewing, that’s for sure, but I’ve tackled curtains before, so I felt I could do this.  I got pink flowery fabric, got it all done (4 panels for 2 windows), hung it and... I hated it.  What was I thinking choosing such a pink dominant fabric when I don’t even care for color pink!  This girly thing must have gotten into my head..  So for the next couple of weeks, I was trying to figure out what to do and then I got it..  I already did a large crochet butterfly as a wall hanging for the room so why not make colorful crochet flowers and saw them to plain white curtains?

I ended up making flowers and little butterflies.  When I was done, I realized that it was missing something..  Once I added stems and leaves, I was satisfied.  I also made some extra flowers and butterflies and glued them to a white nightstand lamp shade I bought.
It took me awhile to accomplish this task (finished it after my baby girl was already here), but it was worth it. I love it.  


I used quite a few patterns I found online.  Some of them are no longer available, but for those I can still find, I’m passing the links here.

Everything, including stems were made using Royale Fashion Crochet Thread Size #3.


Bold Bloom and Sunny Flower are from "Crochet Embellishments" by Jean Leinhauser.


I made the stems using a basic chain stitch.  You can find a tutorial on Sarah's Hand Embrioidery Tutorials website.  


These orchid flowers were designed by Josi Hannon Madera

I cannot find the original website where I got this butterfly from, but similar pattern is all over the internet.  Here's one place where I found it with video tutorials.  For the body, I made a chain and wrapped it around the middle and tied it at the top using the ends as the antennas.


I did not capture all the flowers, but a few of them including this rose were made using patterns from a great website MyPicot.com 


I hope this gives you ideas to create crochet curtains in your home!


Have a colorful day!